Raydium Liquidity Management Guide: Adding and Removing Liquidity Simplified
If you’ve already created a liquidity pool on Solana’s Raydium, there are two key actions you can take:
- Add Liquidity: Increase the size of the pool to enhance trading volume.
- Remove Liquidity: Withdraw liquidity, making the pool non-operational.
Essentially, both actions involve managing existing liquidity, which we call Liquidity Management.
Whether you initially created liquidity on Raydium or through tools like SlerfTools, you can use SlerfTools’ Liquidity Management Tool to easily add or remove liquidity. Below is a step-by-step tutorial.
1. Open SlerfTools and Connect Your Wallet
First, navigate to the Liquidity Management section on SlerfTools. You can find it under the Solana menu labeled Manage Liquidity.
- Open the Liquidity Management page on SlerfTools.
- Connect your wallet by clicking the Connect Wallet button.
Once connected, SlerfTools will automatically display the liquidity pools associated with your wallet, as shown below:
![SlerfTools Liquidity Dashboard]
At this stage, you can choose to Add Liquidity, Burn the Pool, or Remove Liquidity.
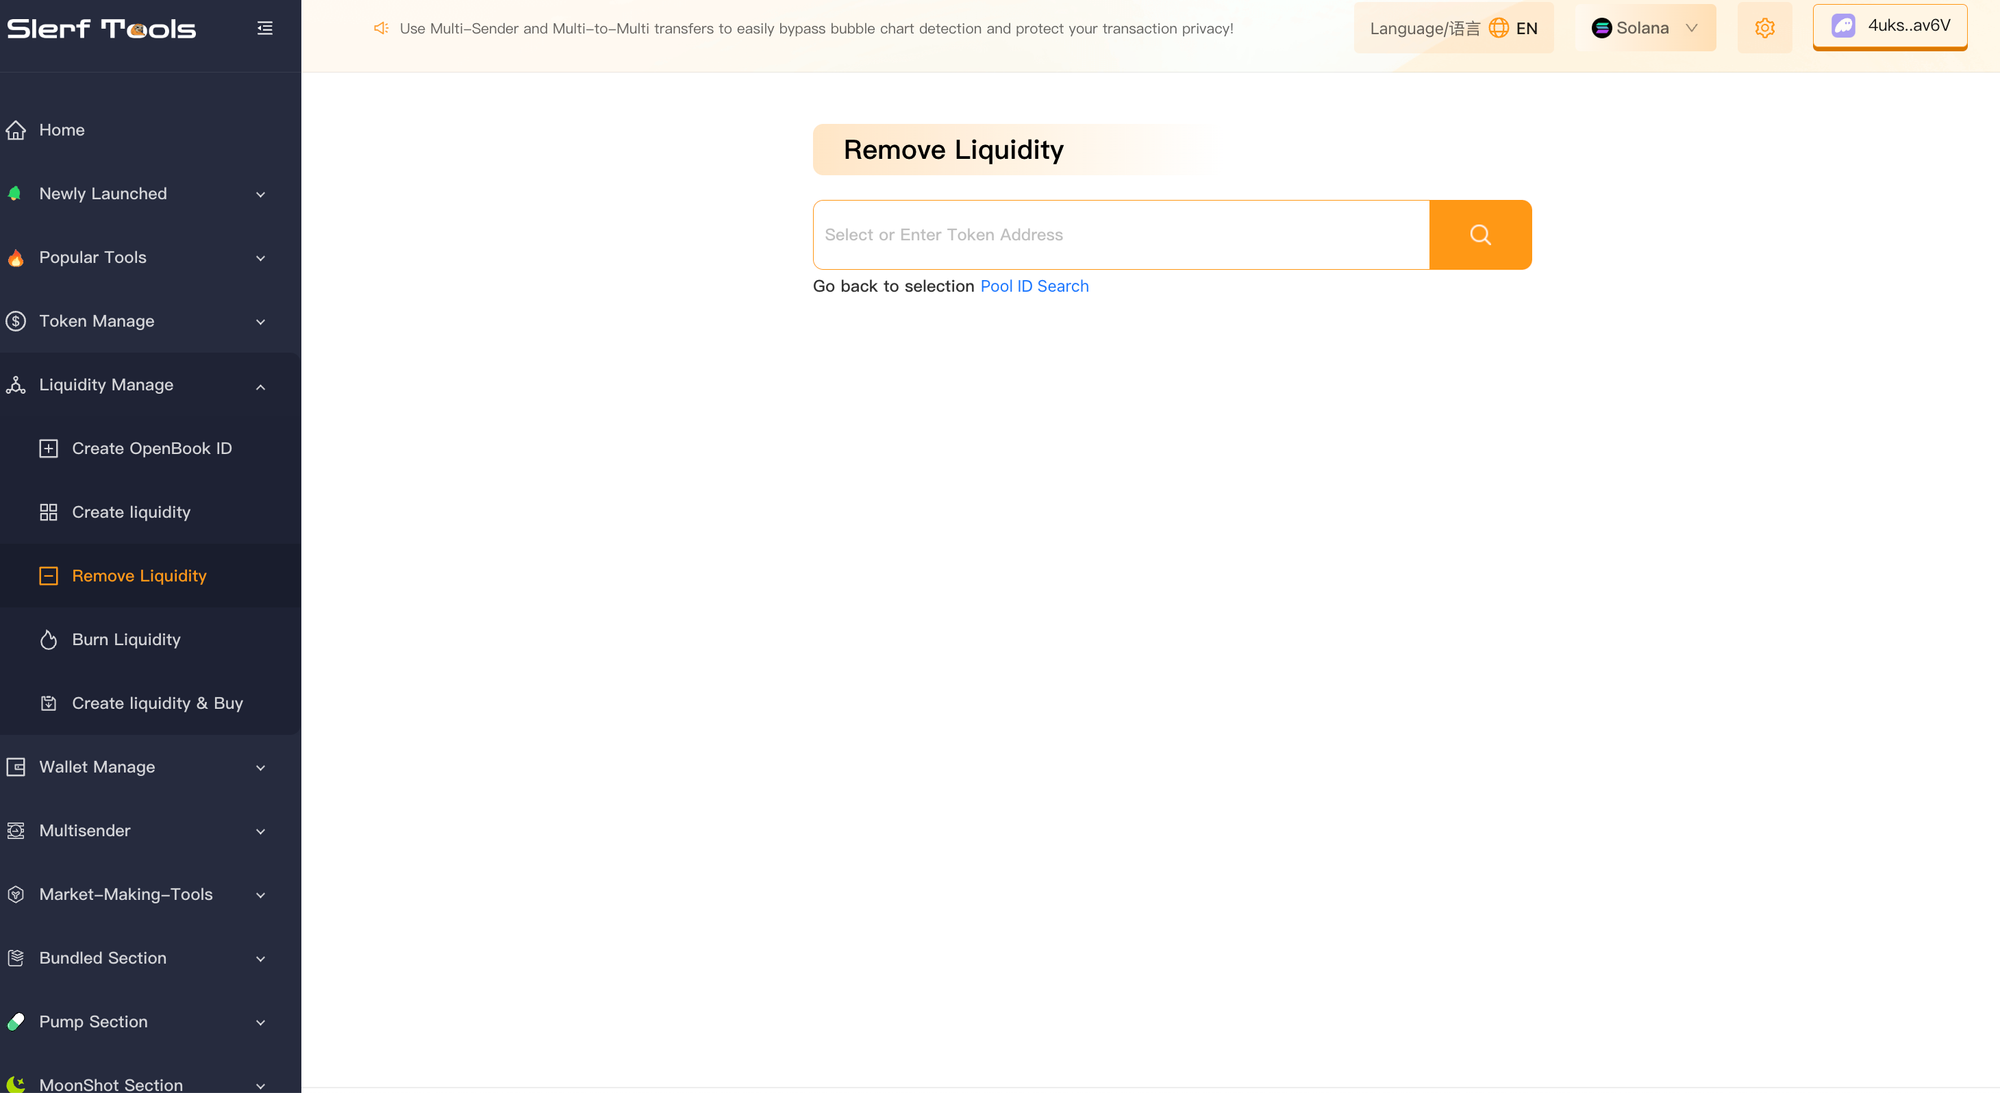
2. Removing Liquidity
What is Removing Liquidity?
Removing liquidity, also known as withdrawing or "closing the pool," decreases the pool size and makes trading unavailable for that token pair.
Steps to Remove Liquidity:
- On the SlerfTools dashboard, select the pool you wish to manage.
- Click the Remove Liquidity button.
- Adjust the percentage of liquidity to withdraw. Currently, SlerfTools supports a one-click Remove All Liquidity option, with partial withdrawal tools coming soon.
Your wallet will prompt you to confirm the action. After confirmation, you’ll see changes in the token quantities in your wallet, reflecting the withdrawn liquidity.
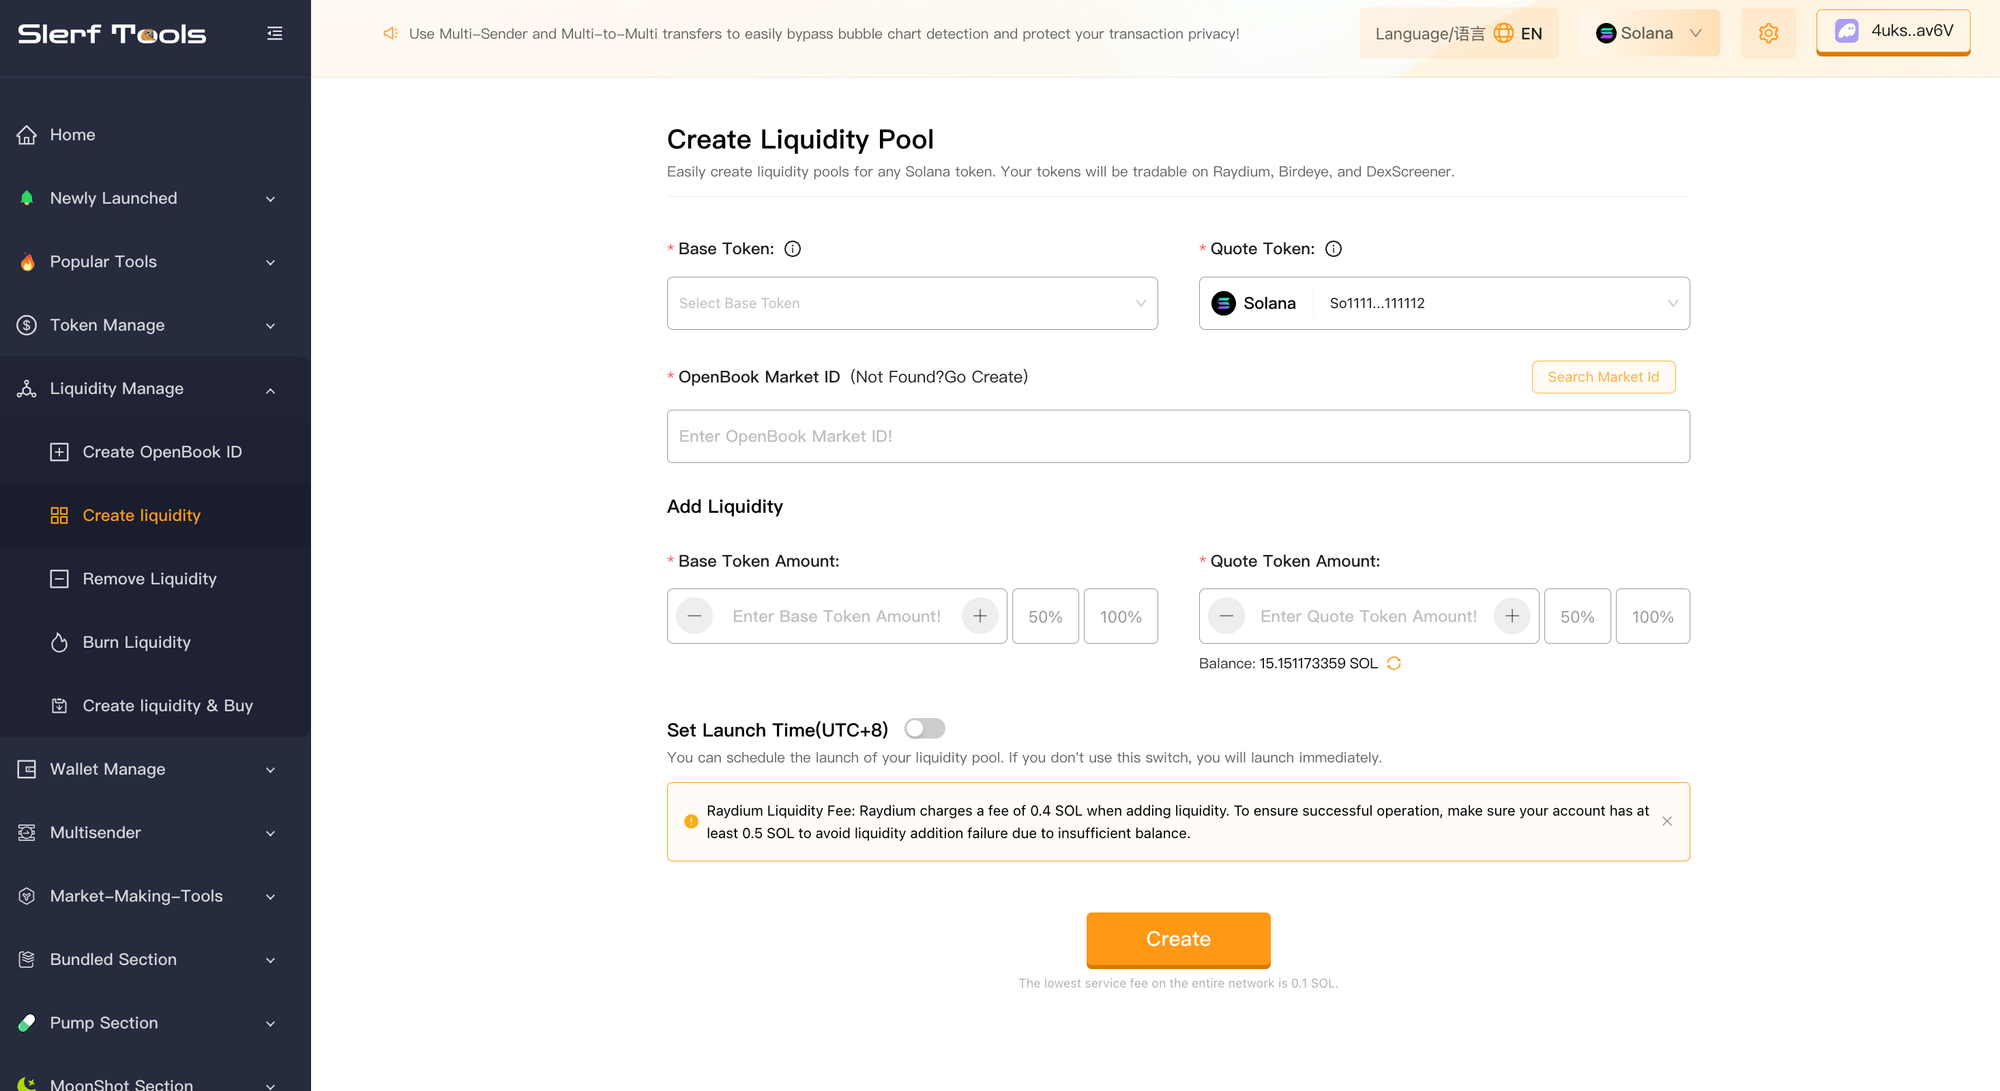
3. Adding Liquidity
If you think your existing liquidity pool is too small and want to increase its size, you can do so with the Add Liquidity feature on SlerfTools.
Steps to Add Liquidity:
- Select the pool where you want to add liquidity.
- Click the Add Liquidity button.
- Enter the amount of tokens you wish to add. SlerfTools will automatically calculate the required LP tokens and the corresponding SOL or USDT amount based on current token prices.
Note:
- The SOL or USDT amount needed is dynamically calculated based on the token’s current market price.
- For USDT pools, you’ll need to supply USDT as the paired asset.
After filling in the details:
- Click the Add Liquidity button.
- Confirm the transaction in your wallet.
Once confirmed, your liquidity will be added to the pool, increasing its size.
Conclusion
Adding or removing liquidity is far simpler than creating a liquidity pool. With SlerfTools, the process is streamlined and user-friendly, allowing you to manage your liquidity pools efficiently.
Whether you want to grow your liquidity pool to attract more traders or withdraw liquidity to repurpose your tokens, SlerfTools makes it quick and easy.
Explore SlerfTools Liquidity Management now and take full control of your liquidity on Solana!